
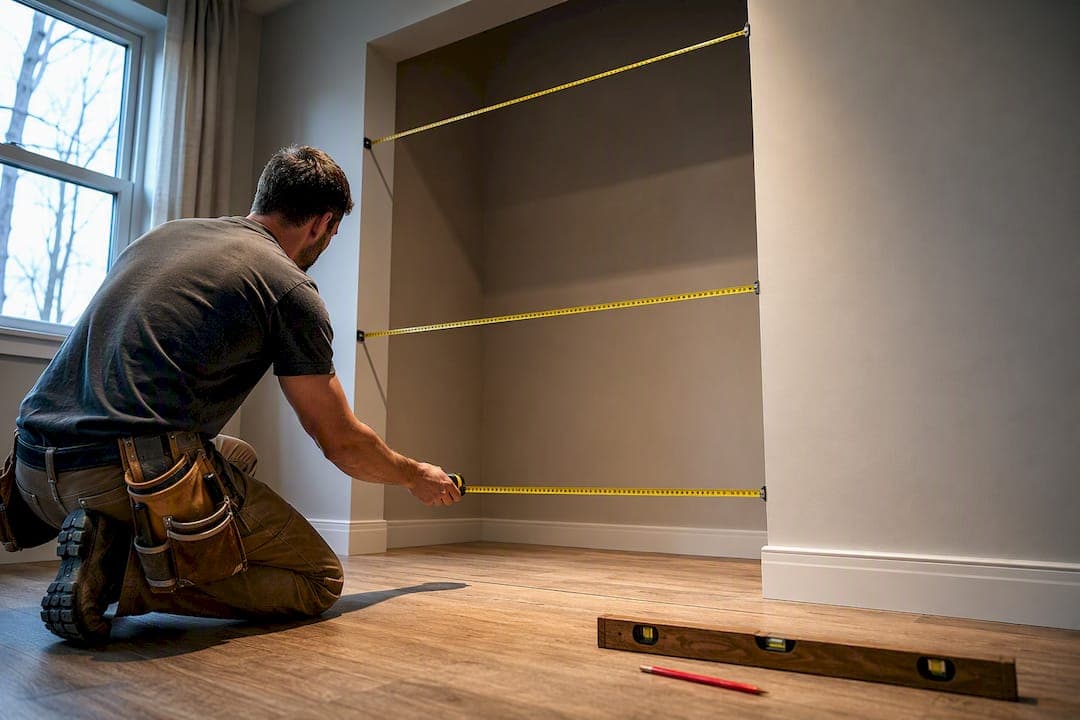
If your wall is irregular, sloped, or has awkward obstructions, go custom. Either way, choose sliding doors for tight bedrooms and hinged doors if you have the floor space for full access. Before you call anyone, measure the wall at three heights and make a quick list of what you actually own.
TL;DR:
- Measure the wall at three heights and use the smallest width to prevent gaps, especially if the wall is irregular or sloped.
- Use full-height doors for a more architectural look, but consider stepped designs for sloped ceilings or older homes with character features.
- Allocate interior space with about 60% hanging, 25% shelving, and 15% drawers for single users, adjusting for shared or family needs.
- Choose sliding doors for tight bedrooms to maximize space, while hinged doors require at least 91 cm of clearance and may cause bottlenecks.
- Opt for plywood carcasses over MDF for durability, especially behind heavily used hinges and drawer runners, and specify hardware ratings during quoting.
Table of Contents
- What Does Good Built-In Wardrobe Design Actually Look Like?
- How Do You Measure a Wall for a Built-In Wardrobe?
- How Should You Divide Wardrobe Interior Space?
- Sliding, Hinged, or Open: Which Door System Fits Your Room?
- What Materials Actually Hold Up Over Time?
- What Drives the Cost of a Built-In Wardrobe?
- What Should You Do Before Calling a Contractor?
- Our Take on Getting the Priorities Right
- Ready to Plan Your Built-In Wardrobe?
- Sources
What Does Good Built-In Wardrobe Design Actually Look Like?
Good built-in wardrobe design starts with the door face, because that's the surface you see every day, and it should match how you actually move through the room. Handleless doors with a push-to-open mechanism suit minimalist bedrooms and small rooms where hardware would clutter the sightline. Dual-tone doors, pairing a light and dark finish, work well in larger bedrooms where you want the wardrobe to read as a feature rather than disappear into the wall. Mirrored doors solve two problems at once in smaller rooms: they bounce light around and remove the need for a separate full-length mirror.
Cabinet face height matters more than most homeowners expect. A full-height design that runs floor to ceiling looks more architectural and eliminates dust-collecting gaps on top, but it costs more in material and often needs a ladder for top shelves. A stepped design, where cabinets vary in height to follow a sloped ceiling or window, tends to suit older homes with character features you don't want to fight.
A few finishing touches consistently punch above their cost:
- Warm LED strip lighting inside open shelving sections
- Pale, matte finishes on doors to make a small room feel larger
- A mirrored panel positioned to catch window light, not block it
Design galleries like Houzz are worth browsing before you commit to a finish. Pro Tip: Save five or six photos you genuinely love and look for the one detail they share. That's usually the actual thing you want, not the whole look.
How Do You Measure a Wall for a Built-In Wardrobe?
Measure the wall width at three points: floor level, mid-height, and near the ceiling. Walls bow and skirting boards vary in thickness more often than you'd think, so use the smallest of the three numbers when you brief a contractor or order a modular kit, a rule Esteller's planning guide backs specifically because it prevents gaps from ever showing up after install.
Depth and clearance numbers to work from:
- Hanging space needs roughly 55 to 60 cm of internal depth
- Sliding doors need a front clearance of about 60 cm, versus roughly 91 cm for hinged doors swung fully open
- Add extra depth (closer to 65 cm) if you're running sliding doors, since the track system eats into the carcass
- Leave a scribing allowance where the cabinet meets skirting boards or an uneven floor finish
That clearance gap between door types is the single biggest planning trap in small bedrooms. A hinged door that needs 91 cm to swing open can turn a walkway into a bottleneck, while a sliding door reclaims that floor space entirely.
How Should You Divide Wardrobe Interior Space?
Split the interior into three zones: hanging, shelving, and drawers. The right proportion depends on who's using it.
- Single-person bedroom: roughly 60% hanging, 25% shelving, 15% drawers.
- Shared or couple's bedroom: closer to 50% hanging, 30% shelving, 20% drawers, since two wardrobes of clothing need more folded storage.
- Family or teen bedroom: more shelving and fewer long-hang sections, since kids' clothing skews shorter and bulkier.
Double-rod tiers, one rail above another, are the most efficient way to store shirts, folded trousers, and short jackets in half the vertical space a single rail would use. Keep at least one full-height hanging section for coats, dresses, and anything that can't be folded over a lower rail.
Drawers are the most expensive interior element, so weigh them carefully against a cheaper freestanding chest of drawers placed elsewhere in the room. Pro Tip: If budget is tight, build the wardrobe with open shelving only and add a separate chest of drawers later. You lose a little visual cohesion but keep real money in your pocket.
Sliding, Hinged, or Open: Which Door System Fits Your Room?
Sliding doors are the right call for tight bedrooms. They need no swing clearance, though the carcass has to run slightly deeper to house the track, and you only ever see half the interior at once.
Hinged doors give full access to the entire interior in one motion, but they demand around 91 cm of clear floor space to swing open comfortably. That's a real constraint in a small room with a bed pushed close to the wardrobe.
A few practical trade-offs worth knowing before you decide:
- Mirror shutters look great but add weight, so hinges and tracks need to be rated for it
- Tall doors above roughly 2.2 meters risk warping over time without reinforcement
- A center rail or a thicker door core stabilizes tall doors and is worth the small upcharge
What Materials Actually Hold Up Over Time?
Plywood carcasses outperform MDF for long-term durability, mainly because plywood holds a screw far better after repeated opening and closing of drawers and shelves. MDF is cheaper up front, and it's fine for low-use decorative panels, but it isn't the material you want behind hinges and drawer runners that get used every single day.
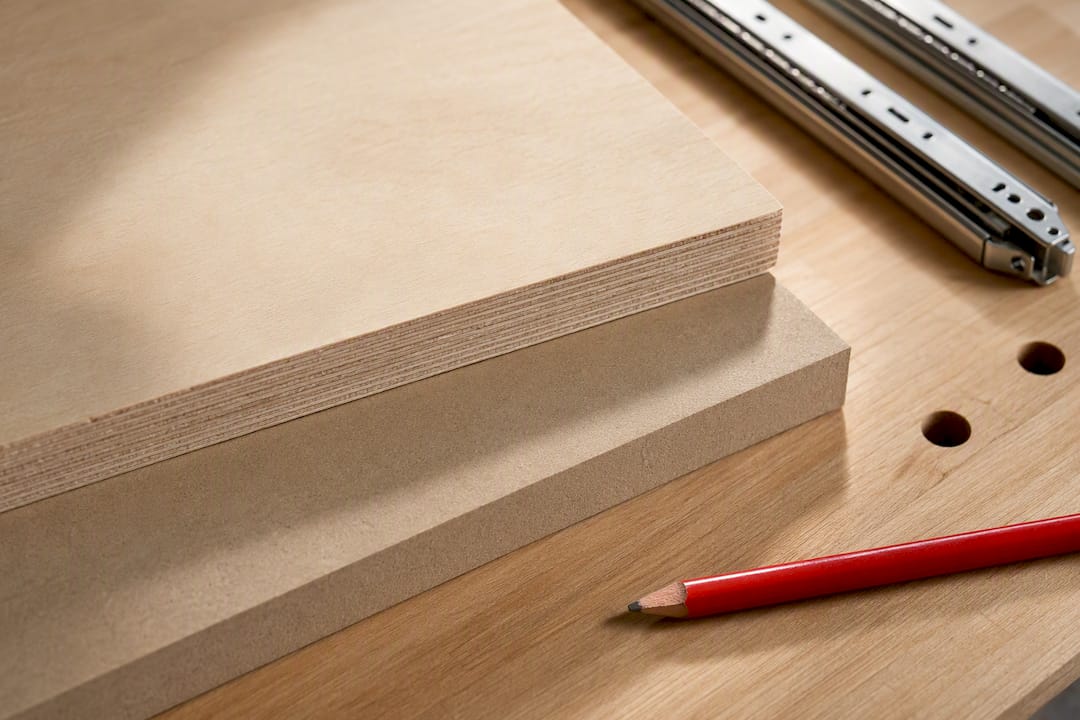
For doors taller than about 2.2 meters, ask for a thicker-core panel or a built-in center rail. Thin, unreinforced tall doors are the most common warping complaint renovators hear a year or two after install.
Hardware is where daily-use durability really shows up:
- Soft-close hinges prevent slamming and reduce wear on the door and frame
- Heavy-duty drawer runners rated for repeated daily use, not just occasional opening
- Sliding door tracks with a solid roller mechanism rather than a plastic guide
Pro Tip: Ask any quote to specify hinge and runner brand and rating, not just "soft-close included." Vague hardware specs are where corners get cut.
What Drives the Cost of a Built-In Wardrobe?
Drawers are the single biggest cost driver in most builds, since they use significantly more material and hardware than open shelving or a simple hanging bay, according to Airtasker's cost breakdown. Beyond drawers, finish choice (laminate versus PU paint versus real veneer), hardware quality, and how complicated the wall itself is all move the final number.
Cost drivers worth interrogating in any quote:
- Number and size of drawers
- Finish type: laminate, PU, acrylic, or veneer
- Hardware grade (hinges, runners, handles)
- Site complexity: uneven walls, services to work around, access for installers
For a regular, unobstructed wall, a modular or configured system is typically faster and cheaper than a fully custom build, and it can still deliver most of the daily function you actually need. Custom work earns its higher price and longer lead time on irregular walls, sloped ceilings, or anywhere you want the cabinetry to feel architecturally built in rather than dropped in, as explained in Custom Closets Designed for Real Life. Always ask for a line-item cost breakdown so you can see exactly what you're paying for.
What Should You Do Before Calling a Contractor?
Get your groundwork done before you pick up the phone. It saves everyone time and avoids a second site visit.
- Measure the wall at three heights (floor, mid, ceiling) and photograph the full wall, including skirting and any power points or vents.
- Note obstructions: window reveals, radiators, sloped ceilings, and the finished floor type.
- Audit what you're storing: count long-hang items, folded stacks, and anything oversized like winter coats or sports gear.
- Ask your contractor directly about lead time, warranty period, whether the carcass is plywood or MDF, who supplies hardware, and their change-order policy if you alter the design mid-build.
On installation day, expect the crew to protect flooring and skirting first, level the plinth before anything else goes in, hang doors last, and walk you through a final snag list before they leave.
Pro Tip: Write your storage audit down on paper before the site visit. Contractors design better layouts when they know you own eleven coats and no folded jumpers, rather than guessing at averages.
Our Take on Getting the Priorities Right
We push clients toward custom builds when a wall is genuinely irregular or when the wardrobe needs to last through multiple bedroom refreshes. On a straight, standard wall with a tight budget or deadline, we'll say plainly that modular makes more sense, because pretending otherwise just wastes your money.
Site measurement is where most problems start, so we handle it ourselves rather than relying on secondhand numbers. Get the interior zoning right, hanging, shelving, drawers, before you spend money chasing a fancier door finish. Function first, then polish.
— Sarah
Ready to Plan Your Built-In Wardrobe?
If you've been weighing a flat-pack modular kit against hiring someone to build it properly, here's the honest trade-off: modular saves you money on a simple, regular wall, but it won't fix a sloped ceiling, an out-of-square corner, or a wall with services running through it. That's exactly where a managed build earns its cost back.

Some contractors handle the parts homeowners find hardest to DIY: an accurate site measure, cabinetry and joinery built to fit your actual wall rather than a generic size, and project coordination to avoid chasing multiple trades yourself. For irregular walls, sloped ceilings, or anywhere you want the finish to look genuinely architectural rather than bolted on, a managed renovation route beats a modular kit every time. If your wall is a straightforward rectangle and you're comfortable managing the install yourself, modular is still a fair call. But if you want it measured once, built right, and installed without you coordinating five separate deliveries, request a site measure with Ariya Construction and get a real quote based on your actual room.